How To Associate Javadoc With Java Library In NetBeans
Provide all the steps required to associate Javadoc with Java library In NetBeans.
In this post, we will discuss the steps required to associate Javadoc with Java library already configured with the Java project.
Create a Project
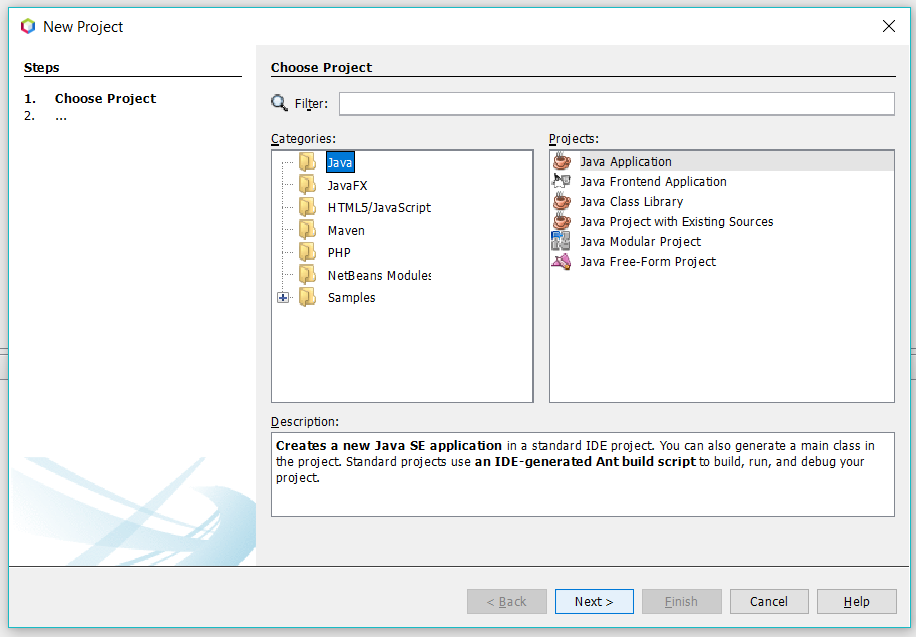
Click on File -> New Project and choose Java -> Java Application to start creating the Java application as shown in Fig 1.

Fig 1
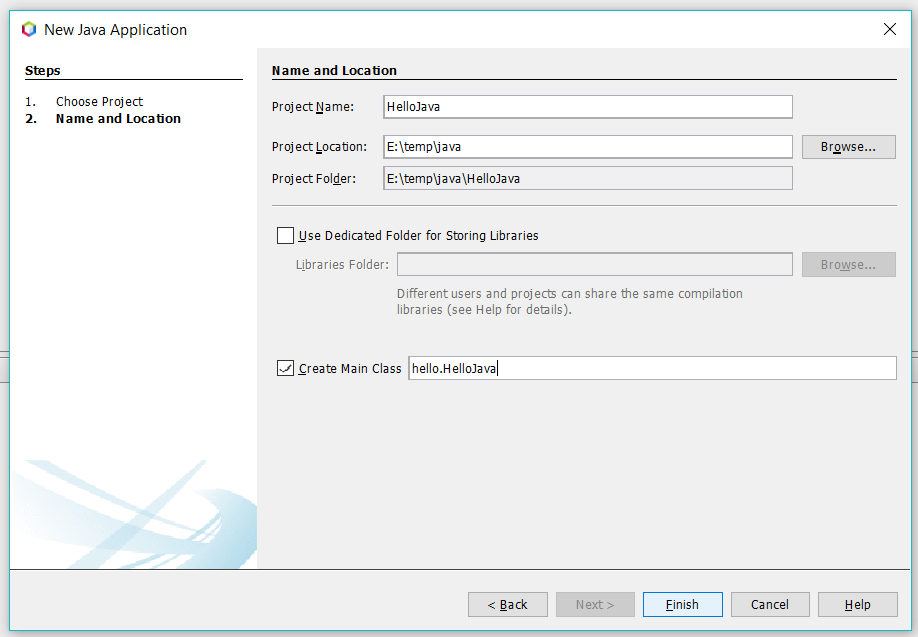
Click on Next Button. The next Dialog shows options to configure Project name and location as shown in Fig 2.

Fig 2
Click on Finish Button to create the project.
Associate Javadoc
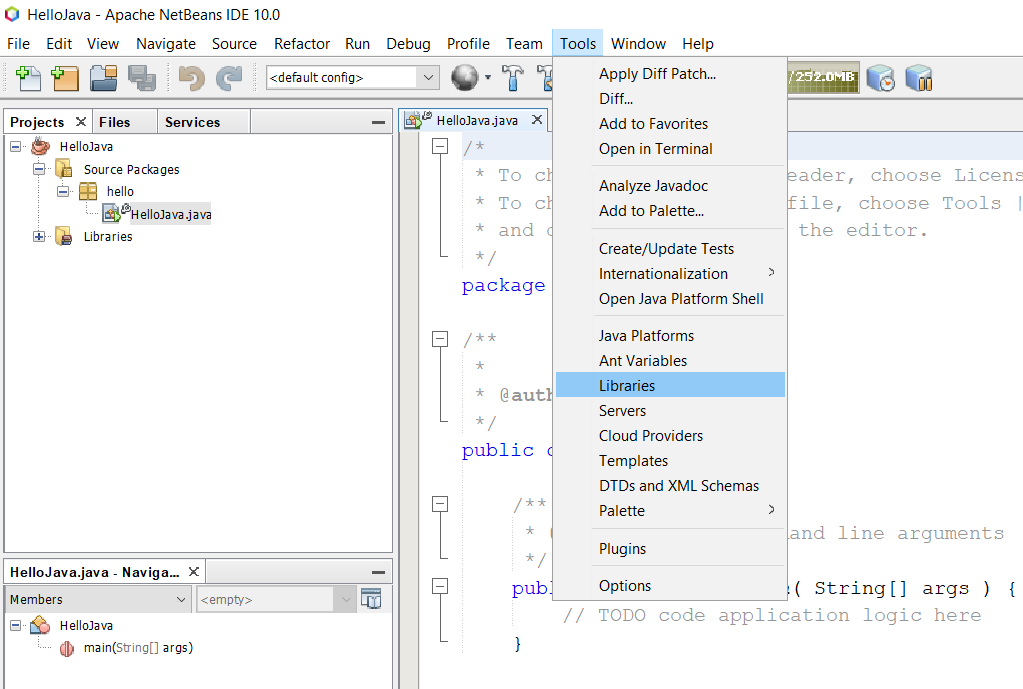
Click on Tools -> Libraries to open the libraries Dialog as shown in Fig 2.

Fig 3
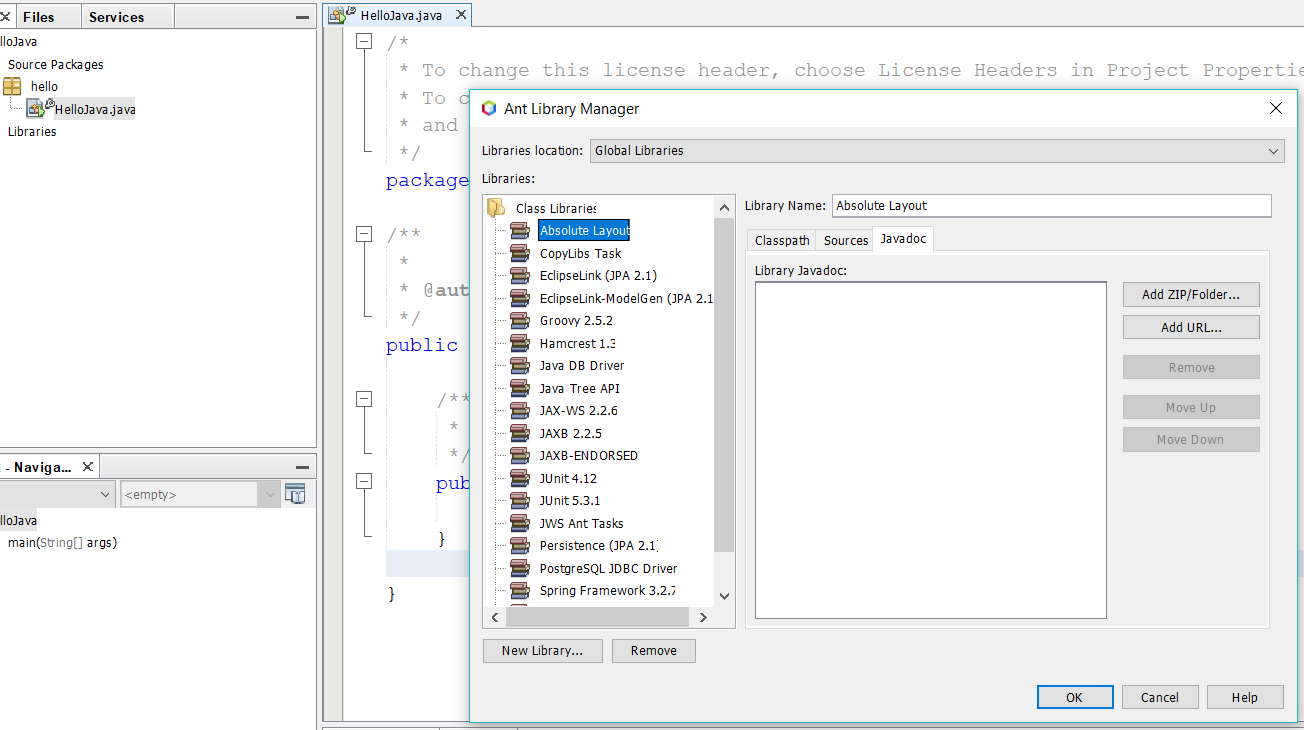
We can associate Javadoc Zip or Folder using the Javadoc Tab on the left side panel for the selected Library as shown in Fig 4.

Fig 4
Click on Add Zip/Folder button on the right panel and choose the local Zip or Folder to associate Javadoc.
Similar we can also associate Sources for the selected library.
Both the options are useful for code hints and understanding the source code of the Library.


