How To Uninstall Java From Windows
It provides the steps required to uninstall Java from Windows 10.
Java is among the popular programming languages used for Desktop and Web application development. We might be required to either uninstall it or completely remove it from the Windows 10 to install the higher version. This tutorial provides the steps required to uninstall Java 8 from Windows 10. The steps should be the same for other versions of Java and Windows.
Notes: The steps provided in this tutorial should be the same to uninstall Java 8, Java 9, Java 10, Java 11, Java 12, Java 13, and Java 14 from Windows. Oracle provides the executables for Windows to install Java. It also provides the zip to install Java 11, Java 12, Java 13, and Java 14 without the installer. This tutorial provides the steps to uninstall Java 8, Java 9, Java 10, Java 11, Java 12, Java 13, and Java 14 installed using the installer. It also provides the steps to uninstall Java 11, Java 12, Java 13, and Java 14 installed without the installer.
Check Java Version
Open the Console application and check the existing Java version as shown in Fig 1.
# Java Version Check
java -version

# Java 8 on my system
java version "1.8.0_241"
Java(TM) SE Runtime Environment (build 1.8.0_241-b07)
Java HotSpot(TM) 64-Bit Server VM (build 25.241-b07, mixed mode)

Fig 1
Uninstall Java - Installed Using Installer
In the previous section, we have checked the versions of Java installed on the system. We can completely remove Java from the Windows system by uninstalling all the versions using the steps mentioned in this section. The steps should be the same for Java 8, Java 9, Java 10, Java 11, Java 12, Java 13, and Java 14 installed using the installer. You might have also installed JRE while installing Java 8, Java 9, and Java 10. This section also provides the steps to uninstall JRE for Java 8, Java 9, and Java 10. There is no separate JRE since Java 11, hence we have to uninstall the JDK for Java 11, Java 12, Java 13, and Java 14.
You can also follow How To Install Java 8 On Windows 10, How To Install Java 11 On Windows, How To Install Java 13 On Windows, and How To Install Java 14 On Windows to install Java using the installer provided by Oracle.
Now type Application on Cortana as shown in Fig 2.
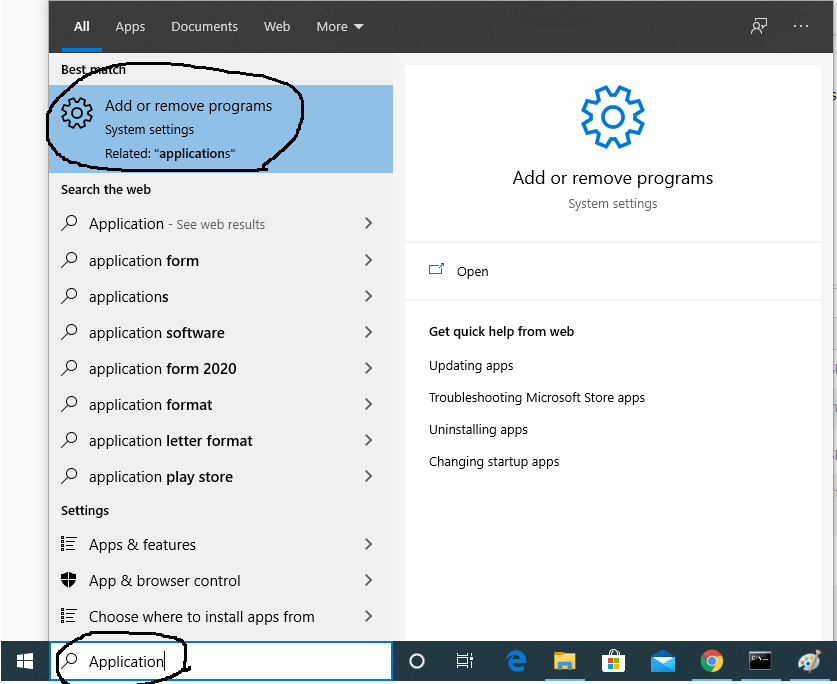
Fig 2
Click the Add or remove programs Option as highlighted in Fig 2. It will show the list of all the applications installed on Windows 10 as shown in Fig 3.
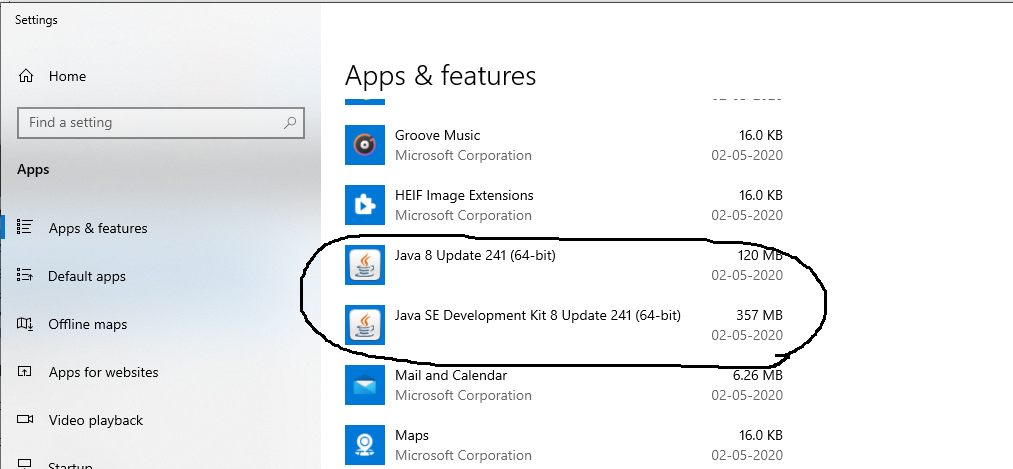
Fig 3
Now click the JRE 8 to be uninstalled as highlighted in Fig 4.
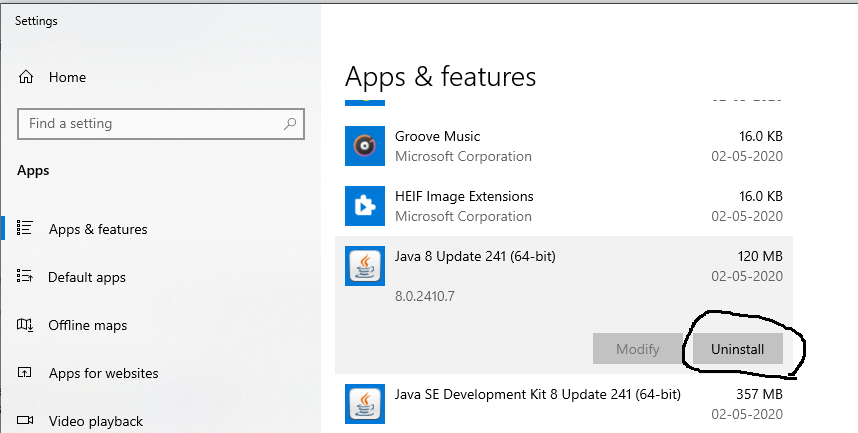
Fig 4
Click the Uninstall Button to start uninstalling the JRE 8. It will ask to confirm the uninstall as shown in Fig 5.
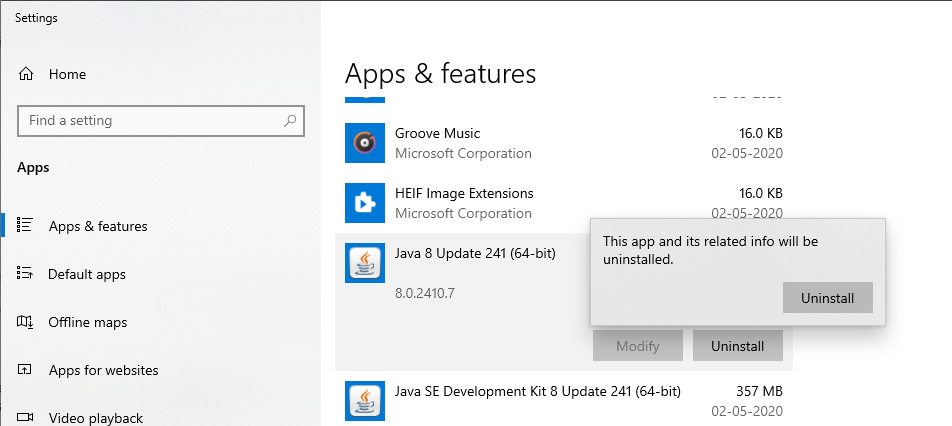
Fig 5
Click the Uninstall Button to remove the JRE 8 from Windows 10. It will uninstall JRE 8 and update the applications list as shown in Fig 6 and Fig 7.
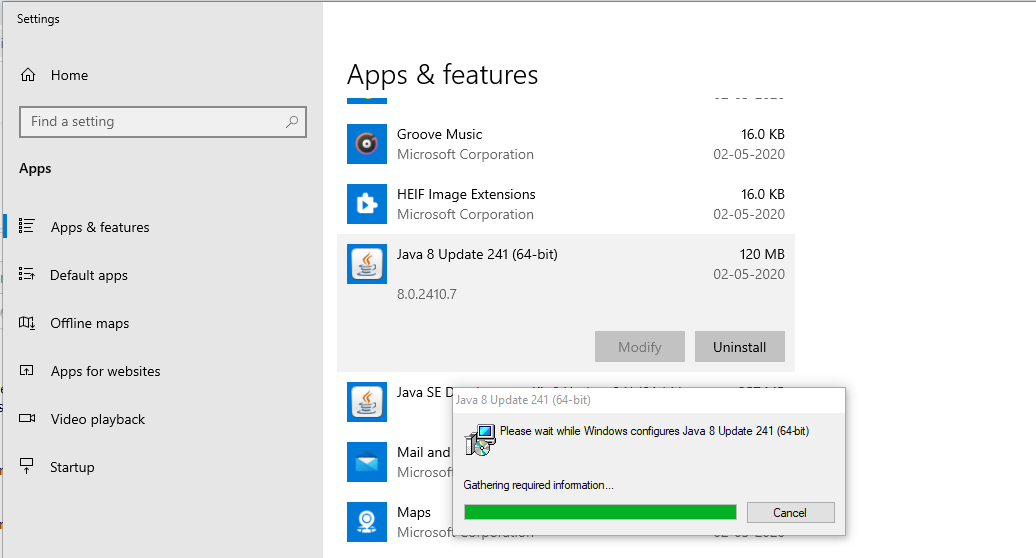
Fig 6
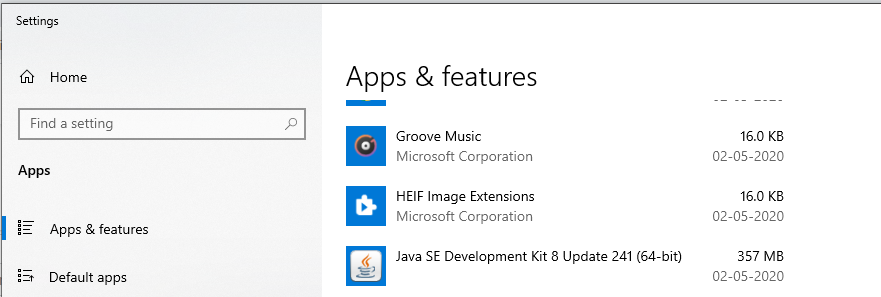
Fig 7
Similarly, uninstall JDK 8 to completely uninstall Java 8 from Windows 10. It also removes the JDK and JRE directories created while installing them. Now again check the installed Java on the Console as shown in Fig 8.

Fig 8
It confirms that Java 8 has been uninstalled successfully.
Similarly, we can uninstall Java 9, Java 10, Java 11, Java 12, Java 13, and Java 14 installed using the installer.
Uninstall Java - Installed Using Installer
We can uninstall the JDK for Java 11, Java 12, Java 13, and Java 14 installed using the zip provided by Oracle. The steps should be the same to uninstall OpenJDK 11, OpenJDK 12, OpenJDK 13, and OpenJDK 14. This section provides the steps required to uninstall JDK 11 installed using the zip provided by Oracle.
To uninstall the Java installed using the zip, simply update the environment variable - Path and remove the row added for Java. It will unlink the Java from the system path. Also, delete the zip extract to completely uninstall Java.
You can follow the tutorial Install Multiple JDKs on Windows to learn about updating the environment variable.
Summary
This tutorial provided the steps required to uninstall Java on Windows 10.


